How to Fix a Leaky Faucet: Easy DIY Repair Guide for Beginners (2026)
Meta Description
Learn how to fix a leaky faucet with this easy DIY repair guide for beginners. Step-by-step instructions, tools, causes, and expert faucet repair tips.
A leaky faucet may seem like a small problem, but over time it can waste hundreds of gallons of water, increase your utility bill, and damage your sink or countertop. The good news is that most faucet leaks are surprisingly easy to repair—even if you have zero plumbing experience.
If you’ve been searching for:
- how to fix a leaky faucet
- DIY faucet repair guide
- faucet dripping repair
- kitchen faucet leaking fix
- bathroom faucet repair tips
then this complete beginner-friendly guide will walk you through everything you need to know.
In this detailed tutorial, you’ll learn:
- Why faucets leak
- The most common faucet problems
- Tools needed for faucet repair
- Step-by-step repair instructions
- How to prevent future leaks
- When to replace instead of repair
By the end of this article, you’ll be able to confidently repair a leaking faucet yourself and save money on professional plumbing costs.
Why You Should Fix a Leaky Faucet Immediately
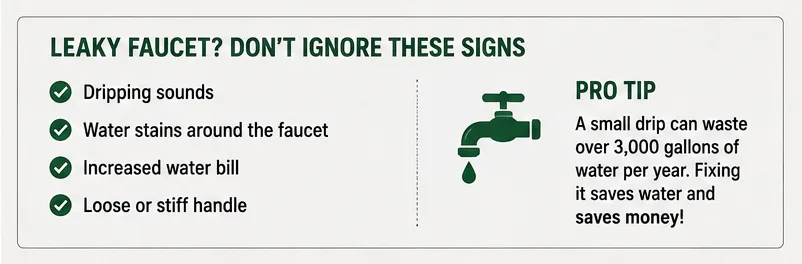
Many homeowners ignore a dripping faucet because it seems harmless. However, even a slow drip can waste a surprising amount of water.
How Much Water Can a Leaky Faucet Waste?
1 drip/second≈3000 gallons/year
According to water conservation estimates, a faucet dripping once every second can waste over 3,000 gallons of water annually.
That means:
- Higher water bills
- Environmental waste
- Possible mold or water damage
- Increased wear on plumbing fixtures
Common Causes of a Leaky Faucet
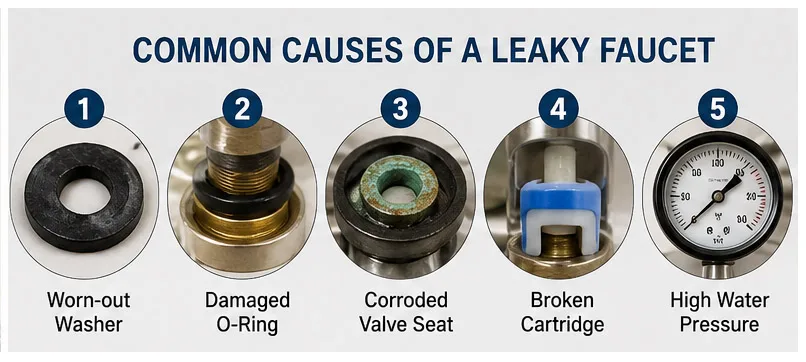
Before repairing your faucet, it’s important to understand why it leaks.
Different faucet types fail in different ways, but these are the most common causes.
1. Worn-Out Washer
A damaged rubber washer is one of the most common reasons for faucet leaks.
Every time you use the faucet, the washer presses against the valve seat. Over time, friction causes it to wear out.
Symptoms
- Constant dripping
- Leak from faucet spout
- Older compression faucets
2. Damaged O-Ring
The O-ring is a small rubber ring that helps seal the faucet handle.
When it loosens or wears out, water may leak near the handle area.
Symptoms
- Water leaking around handle
- Loose faucet handle
3. Corroded Valve Seat
The valve seat connects the faucet to the spout.
Mineral buildup and corrosion can create leaks over time.
Common in:
- Hard water homes
- Older plumbing systems
4. Loose or Broken Cartridge
Modern faucets often use cartridges instead of washers.
When cartridges fail, dripping becomes common.
Symptoms
- Persistent dripping
- Difficulty controlling water flow
- Faucet handle stiffness
5. High Water Pressure
Sometimes the faucet itself isn’t broken.
Excessively high water pressure can force water through the faucet even when closed.
Types of Faucets You May Need to Repair
Understanding your faucet type helps you repair it correctly.
Compression Faucet
Traditional design with separate hot and cold handles.
Most common issue:
- Worn washers
Ball Faucet
Usually found in kitchens with a single handle.
Most common issue:
- Internal ball assembly wear
Cartridge Faucet
Common in bathrooms and modern kitchens.
Most common issue:
- Damaged cartridge
Ceramic Disk Faucet
Highly durable modern design.
Most common issue:
- Seal damage or debris buildup
Tools Needed to Fix a Leaky Faucet
Before starting, gather these basic plumbing tools.
Essential Tools
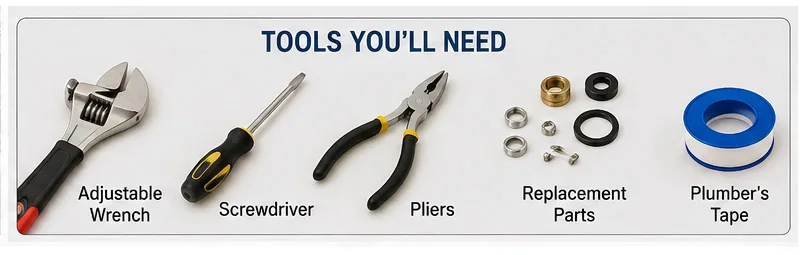
- Adjustable wrench
- Screwdriver set
- Allen wrench
- Replacement washers
- Faucet cartridge
- Plumber’s tape
- Pliers
- Cleaning cloth
Optional Helpful Tools
- Penetrating oil
- Faucet seat wrench
- Flashlight
Safety First: Turn Off the Water Supply
Before disassembling your faucet:
Step 1: Shut Off Water Valves
Look under the sink for:
- Hot water valve
- Cold water valve
Turn both clockwise.
Step 2: Release Remaining Water
Turn on the faucet to drain any remaining water pressure.
Step 3: Plug the Drain
Small screws and parts can easily fall into the sink drain.
Use a sink plug or cloth to block it.
How to Fix a Compression Faucet Leak
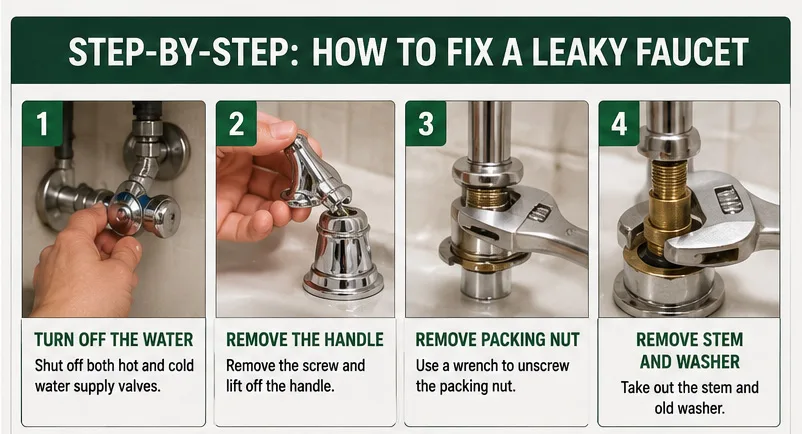
Compression faucets are among the easiest to repair.
Step 1: Remove Faucet Handle
Use a screwdriver to remove decorative caps and handle screws.
Lift the handle carefully.
Step 2: Remove Packing Nut
Use an adjustable wrench to loosen the packing nut.
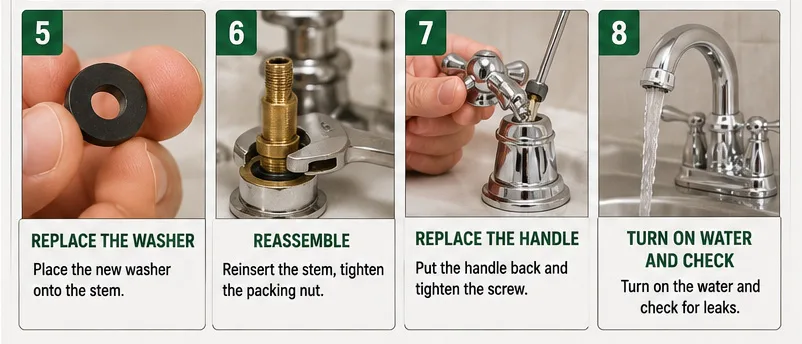
Step 3: Inspect the Washer
At the bottom of the stem, you’ll find a rubber washer.
Check for:
- Cracks
- Flattening
- Wear
Replace if damaged.
Step 4: Reassemble Faucet
Reinstall:
- Washer
- Stem
- Handle
Turn water back on and test.
How to Fix a Cartridge Faucet
Cartridge faucets are common in modern homes.
Step 1: Remove Handle
Locate the set screw and remove the faucet handle.
Step 2: Pull Out Cartridge
Use pliers carefully if necessary.
Step 3: Install New Cartridge
Match the replacement exactly with the old model.
Improper cartridges may cause continued leaks.
How to Fix a Ball Faucet
Ball faucets contain multiple moving parts.
Most repair kits include:
- Springs
- Seats
- O-rings
- Ball assembly
Step 1: Remove Handle and Cap
Disassemble carefully.
Step 2: Replace Internal Components
Install all new parts from the repair kit.
Step 3: Reassemble and Test
Turn on water slowly and inspect for leaks.
How to Fix a Ceramic Disk Faucet
Ceramic disk faucets are durable but can still leak due to debris buildup.
Step 1: Remove Handle
Lift carefully after removing screws.
Step 2: Remove Ceramic Cylinder
Inspect seals underneath.
Step 3: Clean Components
Mineral buildup often causes leaks.
Use vinegar to remove deposits safely.
Step 4: Replace Seals if Needed
Damaged seals should always be replaced.
How to Fix a Faucet Leaking Around the Base
Not all leaks come from the spout.
Leaks around the faucet base usually indicate:
- Worn O-rings
- Loose mounting nuts
- Damaged seals
Quick Fix
- Remove handle
- Replace O-rings
- Tighten fittings
How to Prevent Faucet Leaks in the Future
Prevention reduces future repair costs.
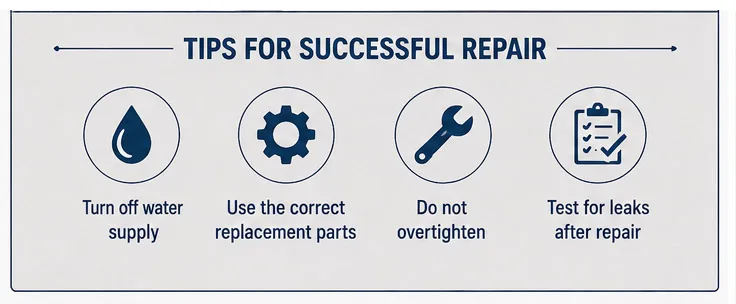
1. Avoid Overtightening
Turning handles too hard damages washers and seals.
2. Clean Mineral Deposits Regularly
Hard water buildup shortens faucet lifespan.
Cleaning Solution
- Vinegar
- Baking soda
- Soft microfiber cloth
3. Install a Water Softener
Hard water is one of the leading causes of faucet wear.
4. Use High-Quality Replacement Parts
Cheap washers and cartridges fail faster.
Invest in:
- OEM faucet parts
- Durable rubber seals
- Corrosion-resistant components
When Should You Replace Instead of Repair?
Sometimes replacement makes more sense.
Replace the Faucet If:
- Repairs happen frequently
- Corrosion is severe
- Parts are unavailable
- Faucet is over 15 years old
- Water efficiency is poor
Best Faucet Materials for Durability
If you decide to replace your faucet, material quality matters.
Best overall durability and corrosion resistance.
Brass Faucets
Traditional heavy-duty construction.
Zinc Faucets
Budget-friendly but less durable.
Beginner DIY Faucet Repair Mistakes to Avoid
Using Wrong Replacement Parts
Always match the original size and model.
Forgetting to Turn Off Water
This can flood your kitchen quickly.
Overtightening Components
Too much force damages seals and threads.
Ignoring Mineral Buildup
Cleaning internal parts improves long-term performance.
Benefits of DIY Faucet Repair
Repairing your own faucet offers several advantages.
Save Money
Professional plumbers can charge expensive service fees.
Learn Basic Plumbing Skills
Simple repairs build homeowner confidence.
Reduce Water Waste
Fixing leaks conserves water and lowers bills.
Increase Faucet Lifespan
Routine maintenance extends fixture durability.
Frequently Asked Questions
Yes. Most faucet leaks are beginner-friendly DIY repairs.
Usually because of worn washers, cartridges, or seals.
Most repairs take 30–60 minutes.
Not usually. Basic faucet repairs are simple for homeowners.
Compression faucets are generally the easiest.
Final Thoughts
Learning how to fix a leaky faucet is one of the most useful DIY home maintenance skills a homeowner can have.
Most faucet leaks are caused by inexpensive parts like:
- Washers
- O-rings
- Cartridges
- Seals
With a few basic tools and a little patience, you can repair your faucet, reduce water waste, and avoid expensive plumbing bills.
Whether you’re dealing with a dripping kitchen faucet, a leaking bathroom sink, or a worn cartridge faucet, the steps in this guide will help you solve the problem confidently.
If your faucet is severely corroded or repeatedly leaking, upgrading to a high-quality stainless steel faucet may provide a longer-lasting solution.